
When setting up a new employee in your businesses back office, it is important to see if they need Sage 200 access and if they do, to add them into System Administration.
If you have access to the System Administration program, setting up new users in Sage 200 is simple and can be done without having to log a call with us.
Adding new users into the System Administration is a simple task that doesn’t drain your time. Find out how to do so in this Tip of the Week!
Adding the User
The user needs to already have a windows user name. The windows user name is then linked into Sage. This is done by adding the windows user to the Sage 200 users group of the active directory. IT would be able to assist you with this stage if required.
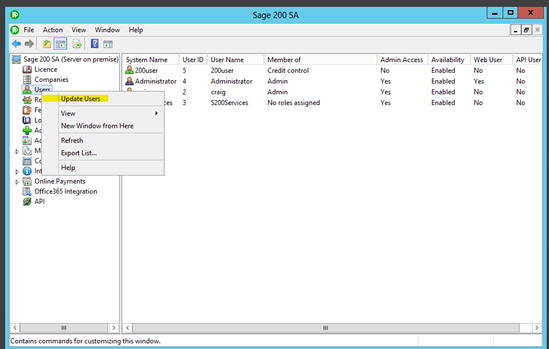
Open Sage System Administration. Users should update when logging in, however, if not right click on ‘Users’ then click ‘Update Users’.
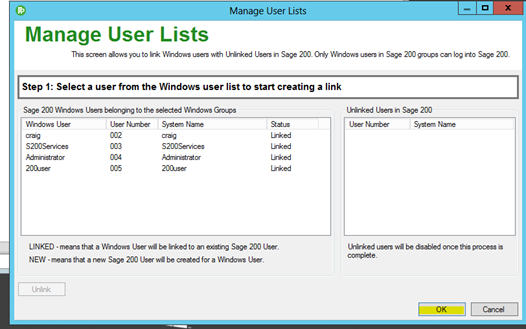
A Manage Users list should pop up, click ‘OK’. New users will then pull through to the user list.
Adding User Permissions
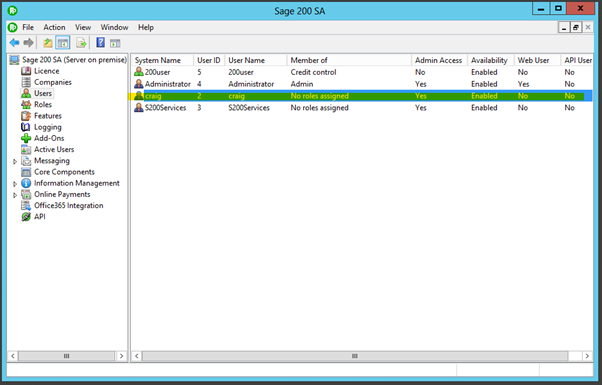
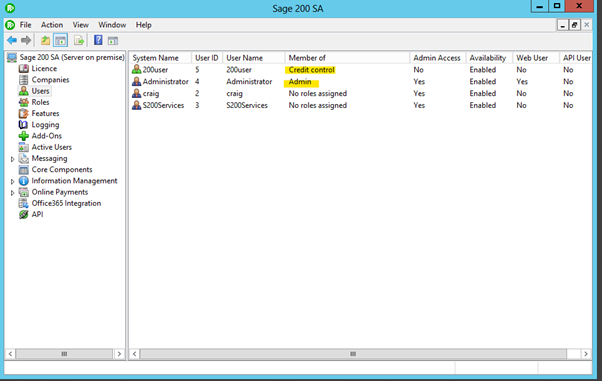
The new user is now in the list, showing as enabled but with no roles assigned.
Next you need to decide what access the user requires in terms of permissions to the various screens and ledgers within Sage. It is likely that you will have existing users who are doing a similar job and therefore the same access can be copied from them. Look at the user name and note which roles are listed in the ‘Member of’ column.
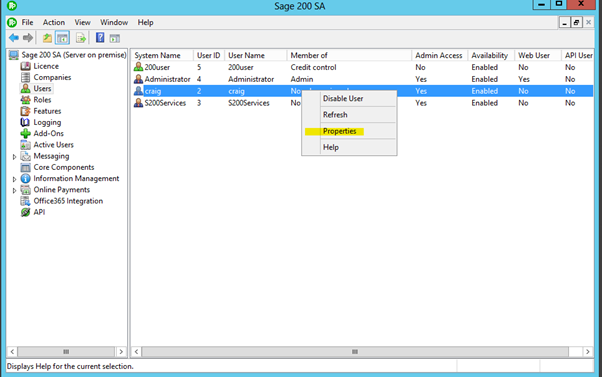
Right click on the new user and select ‘Properties’.
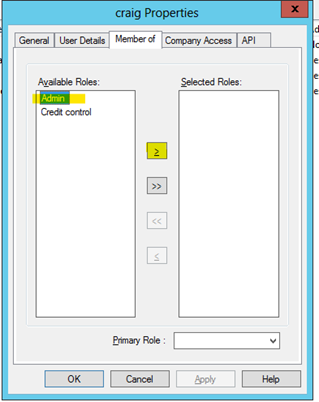
Navigate to the ‘Member Of’ tab and click the role that the other user had. Click the ‘>’ arrow to add that role for the new user. You will see available roles are on the left and selected roles are on the right so you can alter these whenever required.
Find out how to change user permissions in Sales Order Processing.
Adding Company Access
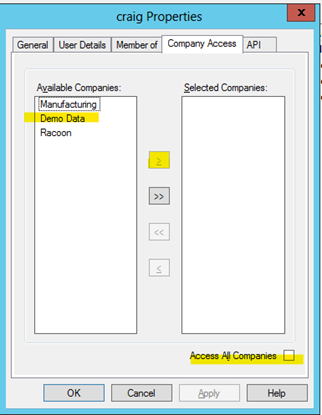
Next navigate to the ‘Company Access’ tab. Here you will see a list of your Sage companies on the left hand side. Simply move any to the left which the new user will require access to. Alternatively you can click the ‘Access All Companies’ tick at the bottom.
Click ‘Apply’ and ‘OK’ which will close this window. The new user is now able to access and work within Sage 200.
Changing a Role
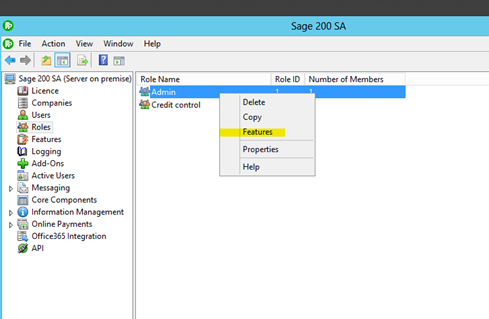
From time to time you may need to alter certain roles so that users have additional access to features within Sage.
In system admin, navigate to ‘Roles’ down the left hand side. Find the role which you want to change and right click, choose ‘Feature’.
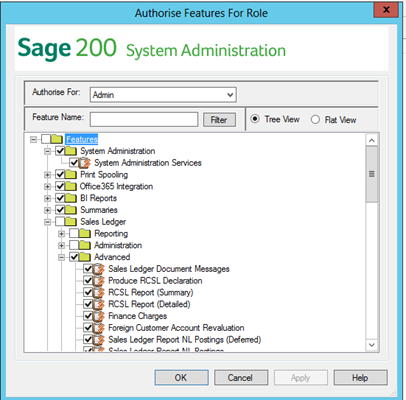
This will open a tree view of all of the features in Sage, simply tick the box against the feature that the role requires. Then ‘Apply’ and ‘OK’. Any users with that role will be able to access the new feature selected after they log out and back into Sage.
Adding features to roles
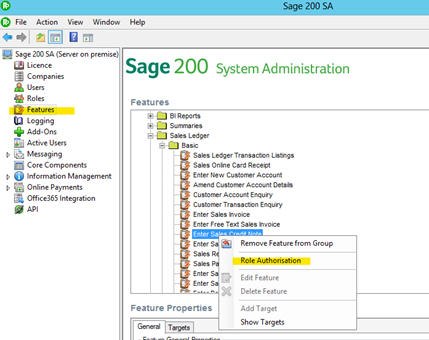
Sometimes you want to add or remove a particular sage screen to multiple roles. It’s easier to do this from the features menu in system administration.
Navigate to features down the left-hand side of the system admin. Then find the feature that you want to add from the tree view. Right click on the feature, choose ‘Role Authorisation’.
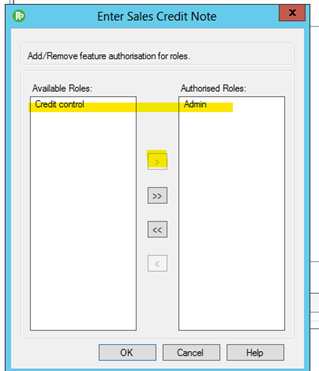
You will then see a list of available roles on the left and roles which already have this feature on the right. You can then move the roles left and right as required. Again, once you have clicked ‘OK’, users with this role will just need to log out and back into Sage to see their new features.
If you would like to stay in the loop about our latest tip then make sure you are following us on Twitter, LinkedIn and Facebook!
As we are constantly looking at ways in which we can improve our service, you are more than welcome to leave your feedback on our form. If you have any suggestions for what you would like to see featured as a tip of the week please email [email protected].
If you would like to discuss a support contract for your Sage system, then take a look at our Sage support service. Contact us via the enquiry forms or call 01332 959 008 if you would like more information.
NB: Be advised that the information/accuracy in this article may differ depending on which version of Sage 200 you use, as a result, some options and processes might look different. For all support queries please email [email protected].
Interested to know more about our Sage solutions?
Call 01332 959008 or enquire online today
"*" indicates required fields